- 3D ТРЕКИНГ текста в AFTER EFFECTS
- Правила сообщества
- Ожившая работа Alena Aenami
- Анимация граффити современным героям
- Как ПРАВИЛЬНО сделать СЛОУ-МО?
- Speed Ramp with Premiere Pro Instead of After Effects
- Discover a quick technique for giving your video footage a speed ramp in Adobe Premiere Pro.
- How to Add Speed Ramps to Drone Videos in Adobe After Effects
- 1. Turn on Time Remapping
- 2. Smooth Out Your Keyframes
- 3. Add in Motion Blur
- 4. Remove Color Banding
- Bonus Tip
- Speed Ramps & Freeze Frames in After Effects
- Learn how to manipulate time and create speed ramps in Adobe After Effects! Let’s dig into all of the helpful AE tools you can use to give your project unique speed effects.
- Freeze Frames in After Effects
- Slow Motion and Constant Speed Change in After Effects
- Ramping and Freezing Time
- How to Create a Premiere Pro Speed Ramp
- What is Speed Ramping?
- Basic Edits in Premiere Pro
- Advanced Speed Ramping Techniques
- Create a Smooth Speed Ramp with Keyframe Interpolation
- Create a Speed Ramp Transition
- Understanding Frame Rates When Working With Speed
- Getting Creative
3D ТРЕКИНГ текста в AFTER EFFECTS
В этом туториале я расскажу вам про очень полезную и крутую штуку — 3D трекинг, а именно — как сделать 3D текст и как его привязать и поместить в окружающую среду с помощью функции 3D Camera Tracker! Мы рассмотрим данную функцию в качестве создания интересных титров для вашего видео, а именно — будем использовать 3D ТРЕКИНГ текста в AFTER EFFECTS для создания эффекта реалистичной надписи на стене.

Правила сообщества
Критикуй, мамкин оператор.
Автор, подскажи пожалуйста, как осуществить задумку? Хочется, что бы в определенном месте на видео «вырос» цветок (любой), какие инструменты нужны?
(АЕ изучаю всего неделю)
Мне Mocha Pro больше нравится. Но и здесь это довольно просто делается. Лайк автору.
Ну, естественно) Мока это мощь)
Нда. а когда-то был ае 4.0 и из 3д только корнер пин)) Трекинг? Вручную — самый верный вариант. И просчет сцены с разделением по сетке.
Когда-то мы жили в пещерах и жарили на огне мяско мамонта. Эх, было время.
На давинчи же все переходят )
Но если серьезно, такие уроки крайне полезны. Оказывается, что сложные на первый взгляд эффекты, вполне возможно сделать самому.
Я тоже с радостью бы перешел на давинчи, но на Фьюжн в разы меньше готовых проектов, которые необходимы в работе. Да и на студии все в Афтере сидят, ибо на нём учились, а проекты как обычно «на вчера», переучиваться и тупить просто нет времени. Заложники ситуации.
Ожившая работа Alena Aenami
Сделал оживление работы прекрасной Alena Aenami ( https://www.artstation.com/aenamiart )
Использовал: Photoshop (отделение слоев) и After Effects (анимация)
Если интересен процесс работы, подписывайтесь, в скором времени выложу пост. И новые оживления классных картин 🙂
Оригинал, by Alena Aenami:

Автор иллюстрации: Alena Aenami
Мой инст: @sviatoslavmrch
Анимация граффити современным героям

Как ПРАВИЛЬНО сделать СЛОУ-МО?
Слоу-Мо (сокращение от slow motion, что в переводе с английского означает «замедленное движение») очень часто и повсеместно используют в видео. Потому что ролик с такими кадрами выглядит круче, эпичнее и драматичнее. В данном видео-уроке я вам расскажу как замедлять видео в Adobe Premiere Pro, а также как создавать так называемые speed ramp — спид рэмпы — плавные ускорения и замедления видеоролика. Также поговорим о фремрейте — что такое FPS и почему эта характеристика важна при съемке правильного слоу-мо!
Источник
Speed Ramp with Premiere Pro Instead of After Effects

Discover a quick technique for giving your video footage a speed ramp in Adobe Premiere Pro.
For the uninitiated, let’s get the basics out of the way first: speed ramping is the process of progressively speeding up or slowing down the frame rate in your video footage. This process can also sometimes just be called ‘ramping’. More often than not video editors will usually drop the footage in After Effects and complete the ramping process there. However Tunnelvizion has provided us with a great video tutorial on how to effectively create a speed ramp in Adobe Premiere Pro. Check it out:

Now, lets explore some speed ramping examples from feature films. First up is The Matrix, one of the most famous speed ramping scenes in film history:

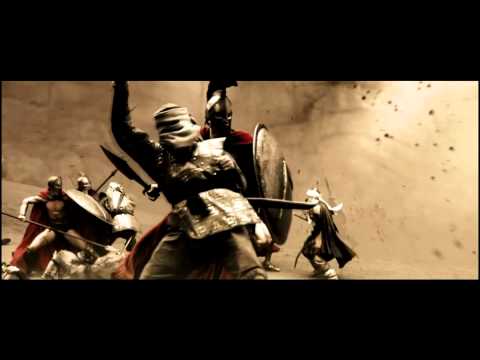
In 2006, the film 300 took speed ramping to a whole new level. Here is the incredible slo-motion battle sequence:
In 2011 we watched as Robert Downey Jr. fought Professor Moriarty in his mind. The use of speed ramping in this scene is well suited to the story:


Speed ramping is now used in a slew of film projects, but unfortunately it’s often without motivation. If you use this technique in your own video projects be sure that it adds to the narrative of the story and is not used only as a gimmicky effect!
Источник
How to Add Speed Ramps to Drone Videos in Adobe After Effects
A stylish technique often seen on drone footage is the speed ramp effect. A lot of popular Youtube vloggers, such as Casey Neistat, use this technique.
Essentially, you start with a long drone shot flying at normal speed. Then, to spice things up, the footage ramps up to a much faster speed and then quickly slows down again. This also helps to cover great distance in a quick amount of time, while also conveying that to the viewer and letting them see the surroundings.
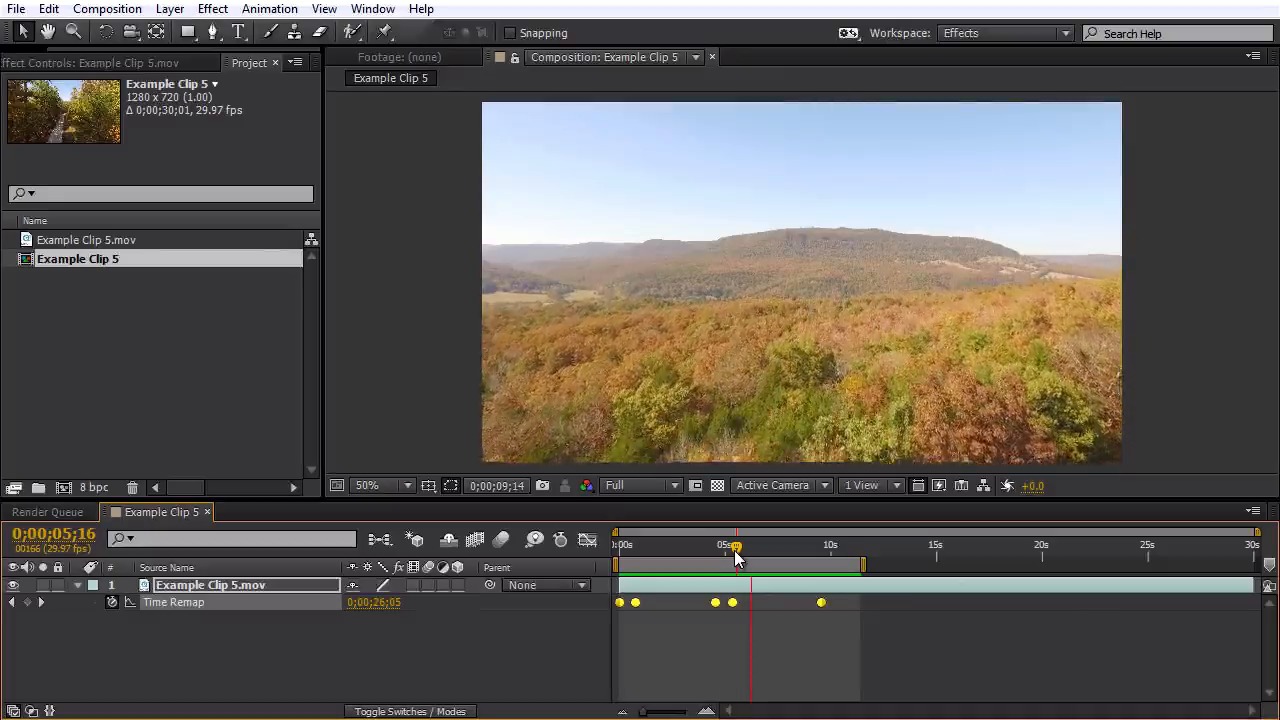
1. Turn on Time Remapping
First you will need to enable Time Remapping on your footage. (Don’t forget to download the example clip included in the Project file for this tutorial!) Right click on your footage in the After Effects timeline and click Time>Enable Time Remapping.


Now you can add keyframes throughout your clip for where you would like your clip to speed up and speed down. Add one at each instance, speeding up and then again at the time you would like it to slow back down. Now move the keyframes for the faster «speed ramp» sections closer together, but leave the normal speed sections the same distance apart.


2. Smooth Out Your Keyframes
Easily smooth our your keyframes by selecting all of them and then Control-click on one of the keyframes. This will create roaming keyframes (the icons should now look round, like dots) and they will help smooth out the speed ramp animation.


3. Add in Motion Blur
Enable Frame Blending on your footage by clicking under the film-strip icon for your footage in the timeline. This will add natural motion blur onto your shot. You can preview this by also enabling Enabling Frame Blending on the timeline preview. (You will see this as the larger film-strip icon above your timeline, located next to Motion Blur.)


4. Remove Color Banding
In some cases you may get a bit of color banding on your footage. You can easily remove this by adding an adjustment layer above your footage and then adding a Noise effect to it. Set the noise value to around 4% with color noise enabled.


Bonus Tip
What is a Speed Ramp effect without an awesome sound effect to go along with it? Be sure to accent your speed ramps with proper «whoosh» type sound design. I prefer sounds with more deeper bass tones that helps sell the wind passing by the viewer at high speeds. This Deep Whoosh sound effect from AudioJungle is a great example. I also really dig the cinematic tone of this Whoosh Impact. Search all of the various whoosh sound effects on AudioJungle to find the one that works best with your drone footage!
Источник
Speed Ramps & Freeze Frames in After Effects

Learn how to manipulate time and create speed ramps in Adobe After Effects! Let’s dig into all of the helpful AE tools you can use to give your project unique speed effects.
Leverage the tools in Adobe After Effects to create unique speed ramps, constant speed change, and freeze frames. Apply these speed effects to make your video editing and motion design projects more dynamic and engaging.
Freeze Frames in After Effects
To create a freeze frame in After Effects, first select a layer in your Composition. Put the playhead on the frame you want to freeze. Select Split Layer from the Edit Menu. The layer is duplicated and split at the playhead.

Select the top layer, right-click, and select Freeze Frame or use Layer > Time > Freeze Frame. The layer now freezes. To mimic a popular TV show, apply the Black & White effect to the frozen clip and add a sound effect when it freezes.

Slow Motion and Constant Speed Change in After Effects
A common request from clients is to make a clip “slo-mo.” Luckily, After Effects makes slow motion easy. Right-click and select Time Stretch. A dialog box opens. Now enter the speed you want.
You’ll want to turn on Frame Blending to get smooth results. Turn on Frame Blending by clicking the Frame Blend switch for the Composition and the Layer (see image below). The dashed line is Frame Mix and the solid line is Pixel Motion. Pixel Motion tends to look more natural — but takes longer to render.

Ramping and Freezing Time
Use After Effects to quickly create speed ramps in your footage, which is great for highlighting action sports or sweeping camera moves. Right -click and select Enable Time Remapping. This creates keyframes at the beginning and end of the layer.


Click on Time Remap, and then click the Graph Editor. This provides a more visual way to work. As seen below, the line shows you the normal speed of the clip.

Command-Click (Control-Click for PC) on the line to add keyframes where you want to change the speed or freeze the action. A flat line freezes a frame, a steeper line speeds up, a shallower line slows down, and if you drag the keyframe lower than the previous keyframe, it plays in reverse. Remember to turn on Frame Blending and Ease Keyframes for a smoother result.

Experiment and have fun with the speed effects in After Effets! Check out the Adobe After Effects help site for for more details on playing with Time. And don’t forget – PremiumBeat has tons of helpful After Effects content!
Got any tips for bending time in After Effects? Share them in the comments below!
Источник
How to Create a Premiere Pro Speed Ramp
![]()
In this tutorial, you’ll learn to create a beautiful speed ramp in Adobe Premiere Pro CC, from capturing the right kind of footage to advanced tips and tricks. Then, we’ll go over ideas and inspiration for when to use a speed ramp. Spoiler alert: if you edit video for any reason, a speed ramp is a great tool to have in your video editing arsenal!

What is Speed Ramping?
Speed ramping is the process of progressively changing the speed of a video clip over time. What might immediately come to mind is using this to highlight actions in sports. For instance, a clip is playing in real-time, then slows down for the duration of a jump, kick, or flip, before resuming normal speed.
While speed ramping is used a lot in sports highlights, adjusting speed can be effective for many types of footage. For instance, check out this example created using this clip of a DJ.
Basic Edits in Premiere Pro
Alright, let’s dive into creating a simple speed ramp in Premiere Pro. Start by adding the DJ clip from the above example in the timeline or whatever clip you want to add a speed ramp to .
1. Before beginning any work with speed, click and drag to increase the height of the video track in the timeline. This will ensure that you can see the speed ramp in the next steps.
If you’re working within a sequence of clips, you may also choose to drag the clip to a new track while you work as speed changes will affect the length of the clip.
![]()
2. Right-click the Fx button on the clip and choose Time Remapping > Speed. The rubber band across your clip now represents the speed of the clip (the default parameter is opacity).
![]()
3. Dragging this band up or down will change the speed of the clip. If you’re starting with a slow motion clip, drag the band up (typically to about 250%-300%) to begin with the clip at normal speed.
![]()
4. To create a speed ramp, you will need to add keyframes. Command + Click (Mac) or Control + Click (PC) the rubber band to add a keyframe. Note that keyframes will display and can be manipulated both in the Timeline and in the Effect Controls panel.
5. Add two keyframes to divide the clip into three parts. Click and drag the middle section up for fast motion, or down for slow motion.
![]()
6. At this point, when you play the clip back, you’ll notice the speed change is abrupt. The effect looks more like a cut than a ramp. Click and drag each keyframe to split it, creating a gradual speed change instead.
Note: if you need to reposition the entire keyframe Option + Drag (Mac) or Alt + Drag (PC) the keyframe. Experiment with different length speed ramps until you’re happy with the timing.
![]()
Advanced Speed Ramping Techniques
Create a Smooth Speed Ramp with Keyframe Interpolation
A speed ramp has keyframes marking a starting and ending point for the speed change, but there are a couple of ways Premiere can get the footage from point A to point B.
Keyframe interpolation is the process of filling in the values in between those two points. Simply dragging to split the keyframe like the last example creates an even speed increase between the keyframes. This is called Linear Interpolation.
To create a smoother, more natural speed ramp, use Bezier Interpolation instead. With Bezier Interpolation, the rate of the speed increase will also accelerate, creating more of a “ramp” feel.
Select a keyframe and click and drag the Bezier handles to create an S-curve shape. Adjust until you’re happy with the results.
![]()
Create a Speed Ramp Transition
Speed ramp transitions are easy and can add visual interest to many kinds of videos. This effect consists of the clip speed ramping up at the end of a clip, then into a cut.
In the second clip, the speed starts fast and ramps down to create a smooth transition. It can suggest the passage of time, a character’s disorientation, or simply add flair to a marketing video. Check out this example using this clip:
In Premiere, create a ramp up at the end of your first clip, and a ramp down at the beginning of your second clip. The speed rubber band will look like a bell curve spanning the two clips.
![]()
Understanding Frame Rates When Working With Speed
When working with video speed, it’s important to understand frame rates. Videos are typically shot and played back at 24 or 30fps. Slow motion is created by shooting at a higher frame rate, (like 60 FPS, for example) and played back at 24fps.
Time Remapping is simply the act of playing the footage back at a different frame rate than which it was shot. But what if you want to create a slow motion shot or a speed ramp like the example above and you didn’t shoot your footage at a high frame rate?
Adobe Premiere will do its best to extrapolate that missing information, but artificial slow motion typically looks a little bit choppy. So, if you’re planning to use a speed ramp to highlight action in slow motion, it’s best to begin with slow motion footage.
Getting Creative
While not every project will benefit from a speed ramp, there are quite a few use cases.
Consider tutorial videos for social media: a beauty creator might demonstrate how to curl a piece of her hair in real-time, then ramp up the speed of the same clip while she finishes the rest of her hair. In a baking how-to video, a creator could add the ingredients to the bowl, then ramp it up for the stir. The reverse can also add style: add ingredients in real-time or fast motion, but slow it down for a dramatic egg cracking.
Speed ramps have a place in narrative structure too. If a character is disoriented, for instance, speed ramping into a cut can provide a transition to evoke that feeling.
And that’s it! Creating speed ramps in Premiere Pro can add function and style to a variety of videos from narrative features to social media posts. Premiere makes it simple to create and refine speed duration right in the timeline to meet any needs.
Источник