- Binance chain wallet connect
- WalletConnect
- What is WalletConnect?
- How does it work?
- Wallets with WalletConnect Support for Binance Chain
- Get Started
- Connecting via WalletConnect
- Protocol Differences
- Sequence Diagram
- Custom Requests
- Example: bnb_sign
- Response (approveRequest)
- Example: bnb_tx_confirmation
- Response (approveRequest)
- Ending the Session
- WalletConnect
- Connecting via WalletConnect
- Protocol Differences
- Sequence Diagram
- Custom Requests
- Example: bnb_sign
- Response (approveRequest)
- Example: bnb_tx_confirmation
- Response (approveRequest)
- Ending the Session
- How to Use Binance Chain Wallet
- Introduction
- What makes Binance Chain Wallet unique?
- Setting up Binance Chain Wallet
- Depositing BNB with Wallet Direct
- Depositing from another wallet
- Adding new tokens to your Binance Chain Wallet list
- Connecting Binance Chain Wallet to Binance Smart Chain
Binance chain wallet connect
Here’s how you can get set up on Trust Wallet and start using Binance Smart Chain in just a couple of minutes.
Setting up your wallet for Binance Smart Chain
1) Download Trust Wallet here . If you already have Trust Wallet, make sure your app is up to date.
2) Complete basic setup of a multi-coin wallet . Remember to save your backup phrases.
3) Go to your Smart Chain wallet and press receive to find your address.

4) Deposit BEP20 assets to your wallet. The easiest way to do this is with Binance. Choose an asset on Binance that supports BEP20 withdrawals and withdraw to your Trust Wallet Binance Smart Chain address. Keep in mind that BNB is required to make any transactions on Binance Smart Chain.

5) That’s it! You’re ready to start using Binance Smart Chain.
6) Once you’ve received a BEP20 token, to view your transaction ID you can click on the transaction, press the share button in the top right and then copy the transaction ID.

Using Binance Smart Chain Dapps
7) For this part, iOS users will need the Dapp browser, which you can get by following this guide . Android users have the Dapp browser by default.
8) Once you’ve topped up your wallet, open the Dapp browser by pressing on the four squares at the bottom of the app.
9) Navigate to a Binance Smart Chain Dapp like PancakeSwap or BurgerSwap.
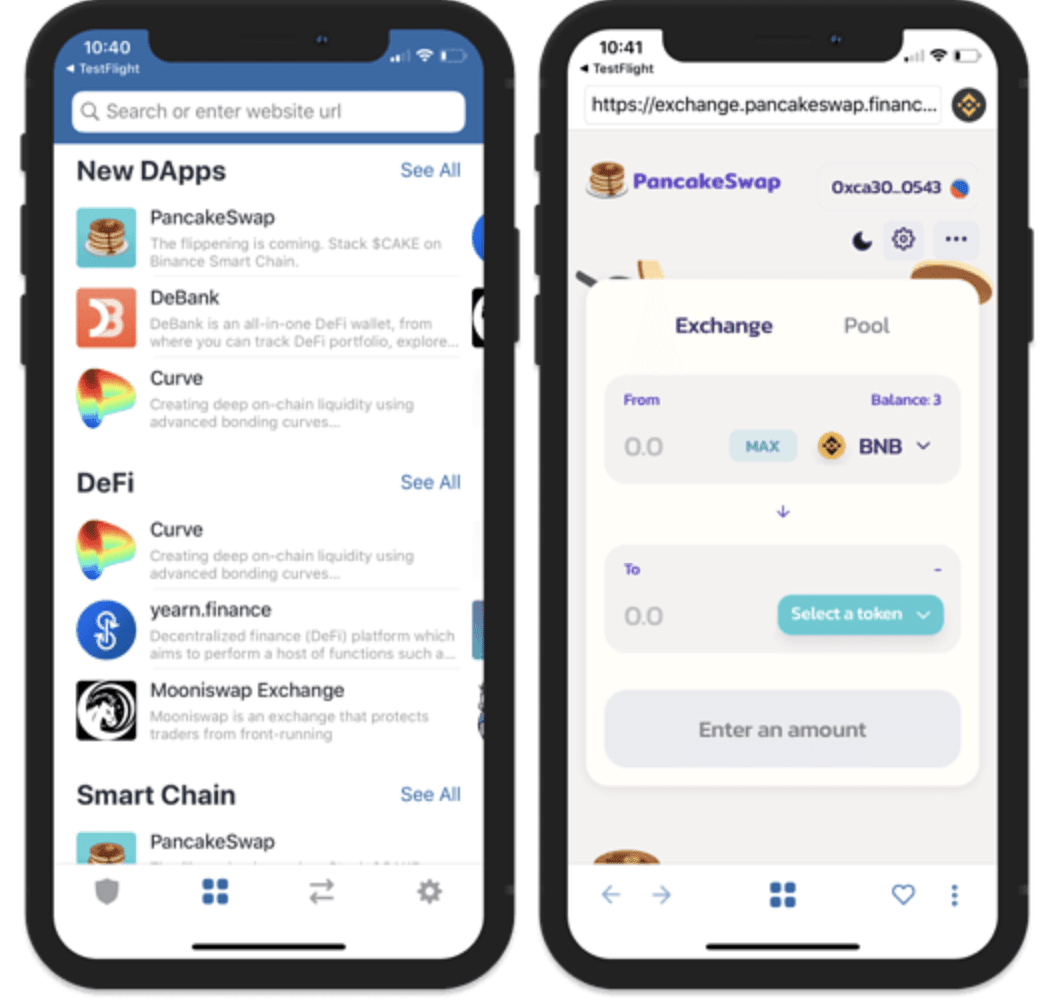
10) Use the Dapp and have fun!
Here are some more detailed guides on how to interact with Binance Smart Chain Dapps with Trust Wallet:
Источник
WalletConnect
What is WalletConnect?
WalletConnect is an open protocol for connecting desktop Dapps to mobile Wallets using end-to-end encryption by scanning a QR code. Opening up a whole world of Dapps that were once only available to Metamask. The user can interact with any Dapp without comprising their private keys and will be notified to sign any transaction requests on their mobile.
How does it work?
WalletConnect is a simple infrastructure that can be setup by any developer. Using a Bridge server to relay the messages without having access to any of its contents. The contents are encrypted using the session data shared by the QR code between the desktop and mobile. There are libraries for Web, iOS and Android. Read more about it in our documentation introduction.
Wallets with WalletConnect Support for Binance Chain
- List of Wallets Supporting WalletConnect on Binance Chain
| Number | Wallet Name | Network |
|---|---|---|
| 1 | Trust Wallet | Mainnet |
| 2 | Math Wallet | Mainnet |
| 3 | Meet.One Wallet | Mainnet |
| 4 | Equal Wallet | Mainnet&Testnet |
| 5 | SafePal Wallet | Mainnet |
| 6 | CoolWallet | Mainnet |
| 7 | XWallet | Mainnet |
| 8 | Atomic Wallet | Mainnet |
Get Started
Currently the WalletConnect protocol has references implementations written in Typescript for the Client (browser/react-native/nodejs), the Bridge Server and the Push server.
To learn more about how to develop, please read the official documentation.
The Binance Chain Web Wallet supports connecting with external wallet providers via the WalletConnect protocol.
WalletConnect allows the user to scan a QR code from the wallet app to unlock and use their wallet seamlessly in the web UI.
In order for this to work, some modifications to the standard WalletConnect protocol are used in the Binance Chain wallet’s implementation.
See the list of wallets which support WalletConnect on Binance Chain here
Connecting via WalletConnect
Wallet providers should make use of the WalletConnect Client SDK for their target programming language and OS. There are implementations on GitHub for iOS, Android, React Native, etc.
Protocol Differences
Since we do not use Ethereum transactions, there are some differences:
Typically sendTransaction is used with Ethereum transaction parameters in WalletConnect dApp integrations. But in Binance Chain’s case, instead of invoking sendTransaction in the WalletConnect flow, the new sendCustomRequest call is used instead with a method called bnb_sign (see below).
The external wallet provider is responsible for sending back the signature and public key of the transaction but should not broadcast the transaction itself. We have instead defined a custom result format in the form of stringified JSON containing the signature and public key. The reason for this is that the wallet app probably does not have access to the complete serialized binary form of the transaction (as this requires Amino encoding).
The web wallet will send back a second custom call (after bnb_sign ) called bnb_tx_confirmation , which contains the boolean result of the transaction build/broadcast and any error message encountered by the web wallet during broadcasting. In a complete implementation, this confirmation callback should be responded to with a call to approveRequest .
Sequence Diagram
This sequence diagram shows the flow of messages when the web wallet interacts with an external wallet provider via WalletConnect.

Custom Requests
A custom call request adheres to this structure:
We have two custom call request formats, here are examples of them:
Example: bnb_sign
Response (approveRequest)
A response like this should be sent back from the wallet app:
In result , a JSON-encoded object must be included containing the following hex-string properties: signature , publicKey .
id and jsonrpc are usually pre-filled by the client SDK, so there should be no need to set this in the object yourself.
signature should be 64 bytes in length (128 hex chars)
publicKey should be 65 bytes in length (130 hex chars, non-compressed form, prefixed with 0x04 )
Example: bnb_tx_confirmation
Receipt of the bnb_tx_confirmation should be confirmed by the app with approveRequest as per the WalletConnect protocol flow.
For this response, result may be empty or contain an empty JSON-encoded object:
Response (approveRequest)
A response like this should be sent back from the wallet app:
Ending the Session
Remember to call killSession() when the user has finished using the integration from your app!
This will redirect the user back to the unlock screen in the web wallet.
Источник
 WalletConnect
 WalletConnect
The Binance Chain Web Wallet supports connecting with external wallet providers via the WalletConnect protocol.
WalletConnect allows the user to scan a QR code from the wallet app to unlock and use their wallet seamlessly in the web UI.
In order for this to work, some modifications to the standard WalletConnect protocol are used in the Binance Chain wallet’s implementation.
See the list of wallets which support WalletConnect on Binance Chain here
Connecting via WalletConnect
Wallet providers should make use of the WalletConnect Client SDK for their target programming language and OS. There are implementations on GitHub for iOS, Android, React Native, etc.
Protocol Differences
Since we do not use Ethereum transactions, there are some differences:
Typically sendTransaction is used with Ethereum transaction parameters in WalletConnect dApp integrations. But in Binance Chain’s case, instead of invoking sendTransaction in the WalletConnect flow, the new sendCustomRequest call is used instead with a method called bnb_sign (see below).
The external wallet provider is responsible for sending back the signature and public key of the transaction but should not broadcast the transaction itself. We have instead defined a custom result format in the form of stringified JSON containing the signature and public key. The reason for this is that the wallet app probably does not have access to the complete serialized binary form of the transaction (as this requires Amino encoding).
The web wallet will send back a second custom call (after bnb_sign ) called bnb_tx_confirmation , which contains the boolean result of the transaction build/broadcast and any error message encountered by the web wallet during broadcasting. In a complete implementation, this confirmation callback should be responded to with a call to approveRequest .
Sequence Diagram
This sequence diagram shows the flow of messages when the web wallet interacts with an external wallet provider via WalletConnect.
Custom Requests
A custom call request adheres to this structure:
We have two custom call request formats, here are examples of them:
Example: bnb_sign
Response (approveRequest)
A response like this should be sent back from the wallet app:
In result , a JSON-encoded object must be included containing the following hex-string properties: signature , publicKey .
id and jsonrpc are usually pre-filled by the client SDK, so there should be no need to set this in the object yourself.
signature should be 64 bytes in length (128 hex chars)
publicKey should be 65 bytes in length (130 hex chars, non-compressed form, prefixed with 0x04 )
Example: bnb_tx_confirmation
Receipt of the bnb_tx_confirmation should be confirmed by the app with approveRequest as per the WalletConnect protocol flow.
For this response, result may be empty or contain an empty JSON-encoded object:
Response (approveRequest)
A response like this should be sent back from the wallet app:
Ending the Session
Remember to call killSession() when the user has finished using the integration from your app!
This will redirect the user back to the unlock screen in the web wallet.
Источник
How to Use Binance Chain Wallet
Introduction
Binance Chain Wallet is the official Binance cryptocurrency wallet for accessing Binance Smart Chain, Binance Chain, and Ethereum. You can use it to securely store your crypto and connect to thousands of projects across different blockchains.
Whether you’re looking to swap BNB for other tokens, mint NFTs, or do yield farming, you can easily do it all with the browser extension wallet. The Binance Chain Wallet currently supports Chrome, Firefox, and Brave.
What makes Binance Chain Wallet unique?
At first glance, Binance Chain Wallet looks similar to other extension-based wallets. There are, however, a few features that differentiate Binance Chain Wallet from the rest. If you already have a Binance account, you can easily link it to your wallet with Wallet Direct. This feature saves you from copying and pasting addresses when transferring digital assets between the two.
- Through your Gmail login
- By using your local device
- With your account password created during set-up
Setting up Binance Chain Wallet
2. After installing the extension, you will see the sign-up page. In this example, we’re going to create a brand new wallet with a Gmail account.
3. Click [Create Wallet] and then select [Continue with tKey via: G].
4. A pop-up will appear asking you to log in using Gmail. tKey and Binance Chain Wallet will use your Gmail account as a way of authenticating your identity in the future if needed.
5. The next step is to create a password that can act as a second layer of protection should you lose your private key.
You should never share your seed phrase with anyone. Treat it similar to a banking account password or pin. If you lose it, you can still gain access to your Binance Chain Wallet using your email address in combination with your tKey password.
7. Click continue once you are sure that you have securely stored the seed phrase.
Depositing BNB with Wallet Direct
If you already have some BNB in your Binance spot wallet, you can connect your account with your Binance Chain Wallet using the [Wallet Direct] feature.
1. Click the icon on the top right of the wallet’s homepage, and then click [Connect to Binance.com account].
2. Log in to your Binance account and click [Verify and connect my address].
3. You’ll now see a pop-up asking you to [Connect to wallet]. Clicking this will open up Binance Chain Wallet, where you can click [Connect].
4. Next, you will need to give permission for your wallet to sign Binance’s message. This step verifies you are the owner of the wallet and permits it to connect.
5. Once you have completed the previous steps, you will have to go through Binance’s authentication process as a final layer of security. If you have 2FA linked to your account, you will also have to use it.
7. To start transferring funds from your Binance account, click the [Receive] button and choose [Wallet Direct].
8. You’ll now see the balance of your available assets to transfer.
Depositing from another wallet
You can also deposit directly from another wallet. In this example, we will transfer BNB from our Binance account wallet to the Binance Chain Wallet.
2. On your Binance Chain Wallet, click [Binance Chain Native Token] and then [Receive].
Adding new tokens to your Binance Chain Wallet list
1. After setting up your Binance Chain Wallet, you will by default only see your BNB balance. You can add more coins by searching from the list available by clicking the [+] button.
2. Look for the token you want to add and click the check box. In this example, we’ve added Binance-Peg Ether. Your wallet will still accept deposits of a token even if you haven’t checked it on the list. Checking a token simply makes the balance visible.
Connecting Binance Chain Wallet to Binance Smart Chain
It’s easy to interact with Binance Smart Chain using your Binance Chain Wallet. It only takes a couple of clicks, and you can get started staking, swapping, and interacting with DApps. Let’s take a look at how to connect with PancakeSwap. Almost all DApps will have the same UI for connecting your wallet.
1. Click the [Connect] button in the top right corner of the screen.
2. Select [Binance Chain Wallet]. Note that not every DApp will support using Binance Chain Wallet.
3. A pop-up will appear asking if you want to connect to the DApp. Click the [Connect] button to confirm.
4. Your wallet address should now appear in the top right corner.
Источник